
CONTACT US
21000 Frontage Rd, Suite 10
Belgrade, MT 59714
Phone 406-388-3458

Pricing & Info
FLOOR PLANS TO 1,000
FLOOR PLANS 1,000 to 1,500
FLOOR PLANS 1,500 to 2,500
FLOOR PLANS 2,500 + sq ft
LOG GARAGE PLANS
RANCHES To 1000
RANCHES Over 1000
“Almost” Ranch Plans
Other Home Design Options
Log Home Kitchens
Sue | September 13th, 2011 - 6:47 amOne room that is very important to almost everyone building a new log home is the kitchen. Log home kitchens are not constructed exactly like other homes. All logs shrink some, so there is a need to protect the cabinets from the downward pressure. So let’s take a look at how a kitchen is built into a log home and also some good design techniques. These details are very important too if you are planning to build your log cabin yourself.
A kitchen can be located anywhere in the log home. Often they are located on the side of the great room, stepped back under the open loft, or the kitchen is located in the center of the great room, breaking the floor plan between the living room area and the dining room. One common denominator in almost every home is the desire for lots of space in the gourmet kitchen. While other areas, such as bedrooms, may be limited to just one or two, the kitchen receives much attention.
During the blueprint stage the kitchen is designed according to the owners wants. All logs shrink some, so this is where extra preparedness must be done. Kitchen cabinets cannot be attached directly to the logs. If it is then the logs will damage the cabinets as they shrink. To prevent this from happening the contractor must build a framed wall on the inside of the log wall. Then the cabinets are hung from the framing. The logs are first scored with a vertical channel. Then a 2×4 is sunk into the groove. This is done either 16″ or 24″ on center. Then green board is hung from the stud wall. Then the cabinets are mounted to the wall. Green board is a type of drywall that is designed for wetter areas such as kitchens and baths. But some luxury log cabin home owners want all wood in their homes. In this case the green board can be replaced with 1×6 pine or cedar tongue and groove. The principle with shrinkage is that the logs will press down on the framing lumber leaving the cabinets free of any vertical pressure.
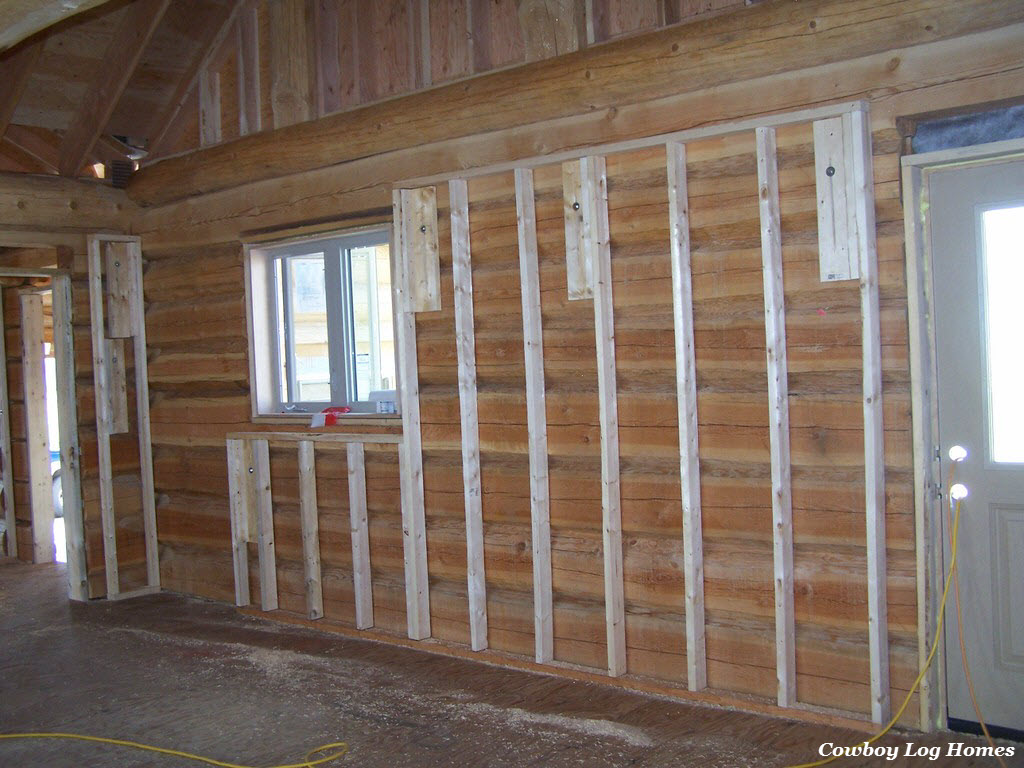
Framed Wall Behind the Kitchen Cabinets in the Bear Creek Plan
The framing in the kitchen is done first. Then the green board or tongue and groove is installed. Next the tile flooring is laid. Then the island is constructed and cabinets are hung. Lastly the counter tops are installed and appliances set into place. When something is not done in this order then more time is required and more labor costs.

Blue Board Installed for Kitchen
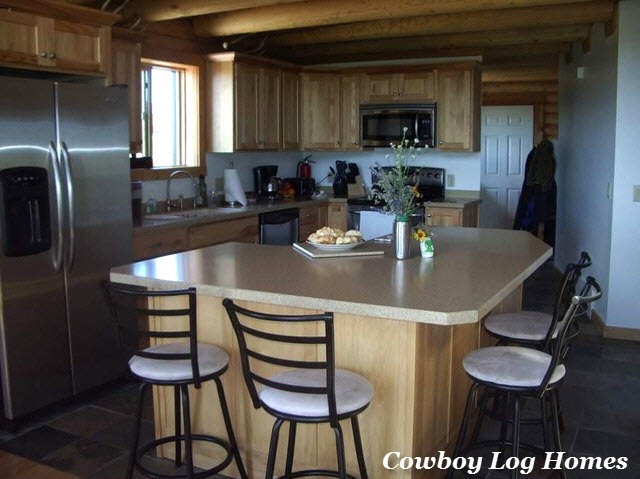
Finished Log Home Kitchen
When considering the design of a log home kitchen the “work triangle” is very important. This is the area between the stove top, kitchen sink, and refrigerator. This area should not be any larger than about four feet on each side of this triangle. Arranging the kitchen with this layout allows easy access to the vital parts of the kitchen. Counter tops space is also very important. Having at least a foot of space on each side of the stove, sink, and refrigerator allows adequate space for setting pots, dishes, food, cutting boards, etc. Most kitchens are designed with islands. The space between the wall cabinets and the island should be about 48″ apart. If the area is wider then it becomes a ‘hike’ from one end to the other. If more than one cook will commonly be in a kitchen at the same time, the a slightly larger width is good, but don’t go too wide.
One of my favorite features in log home kitchen designs is locating a breakfast bar on the backside of an island. This keeps the kitchen open and also allows visiting while cooking. The island also can serve as extra space for preparing food and laying out buffet style meals. Islands for seating need to be at least 36″ deep. Wider, such as 48″ is very useful. For each bar stool 24″ of space should be allowed per person. This keeps people from bumping into one another while eating. Many of our log home plans have this option built into them.

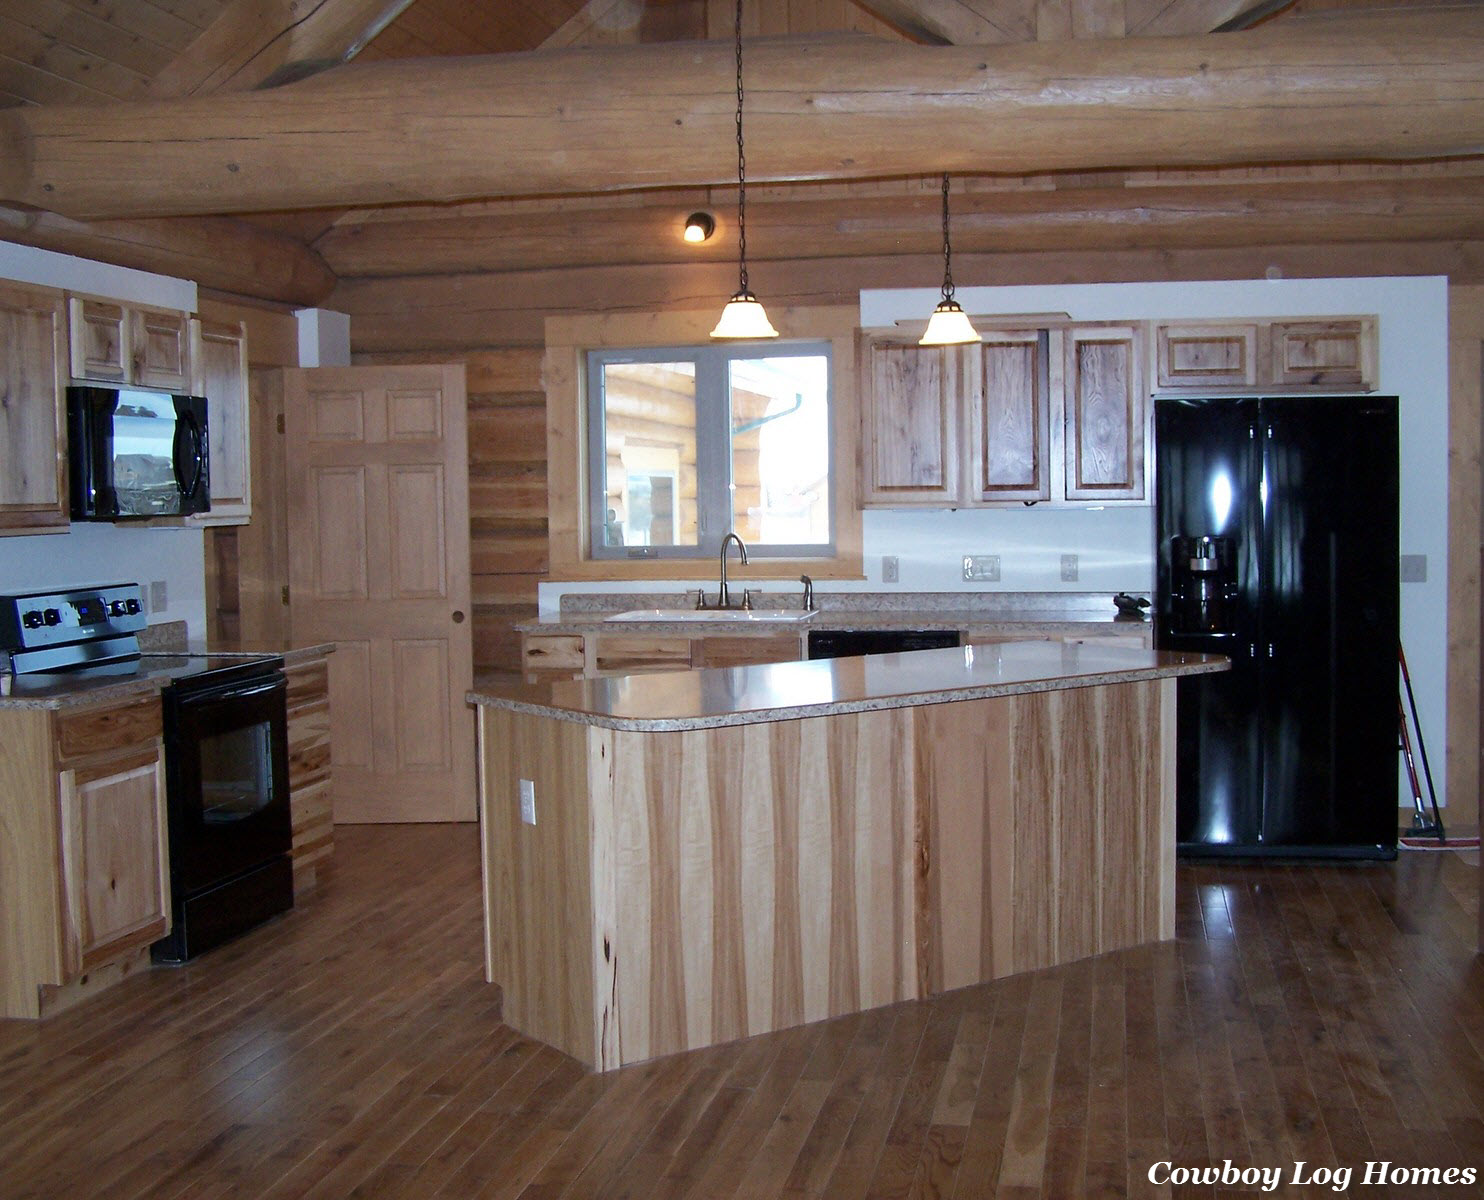
Montana Log Home Plan Kitchen
From the top of the base cabinets to the bottom of the wall cabinets needs to be spaced at about 18″. Any narrower is not a good idea. And making that space any wider makes it harder for the cook to reach the top shelves. To keep an open feel to the kitchen wall cabinets are often limited. But overhead cabinets are needed for glassware, plates, and so much more. If you are one who wants lots of upper cabinets, then locating the kitchen in a corner of the home might be better. Another solution is to use a row of cabinets between the kitchen and another room. Extending the wall only part of the way across the opening and using glass door units allows for a more open feeling.
For storage, which we all seem to need more of, many kitchen designers allow about twenty square feet of all purpose storage. This can be increased based on how many people live in the home. The free standing kitchen pantries are a great asset if there is no space for a walk in pantry in the floor plan. We have a custom cabinet designer that we work with who can help you with your layout before you finalize the drawings on your home. Log home kitchens and dining rooms (such as the Red Cedar dining room above) should be gorgeous, spacious, and adapted to your specific needs. And when your home is finished be sure to send us your very own log home kitchen pictures!
Note: For ideas for small log cabin kits kitchens be sure to look through the plans Under 1000 Square Feet.