
CONTACT US
21000 Frontage Rd, Suite 10
Belgrade, MT 59714
Phone 406-388-3458

Log Profiles
FLOOR PLANS TO 1,500 sq ft
FLOOR PLANS 1,500 to 2,500
FLOOR PLANS 2,500 + sq ft
LOG GARAGE PLANS
Other Home Design Options
Day Eight~Shingles & Window Bucks
July 20th was the beginning of our eighth day of construction of our handcrafted log home in Gallatin Gateway, Montana. The order of the day is to finish the architectural shingles and the installation of door and window bucks.
There are some interesting features required by log homes for the windows and doors to prevent binding with the logs, so be sure to refer to the latter part of this page for more details. Let’s begin with the final roofing materials.
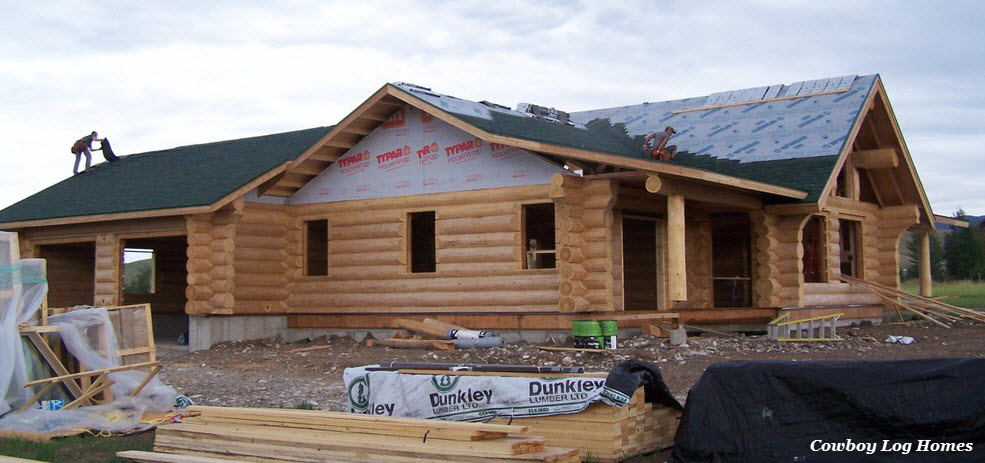
In our second photo we see the roofing is almost totally completed on the back side of the home. Some extra bundles are still seen on the left ridge. Also close inspection of the window opening on the far right of the photo and the window opening second from the right side reveal that the window bucks have been installed for these windows.
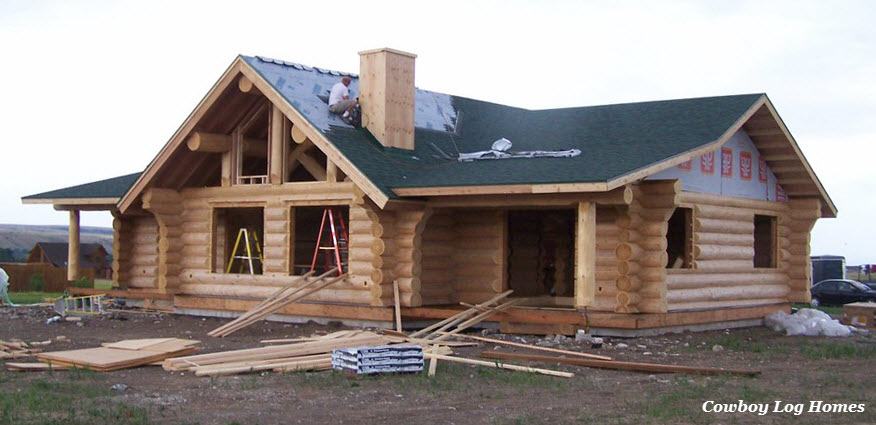
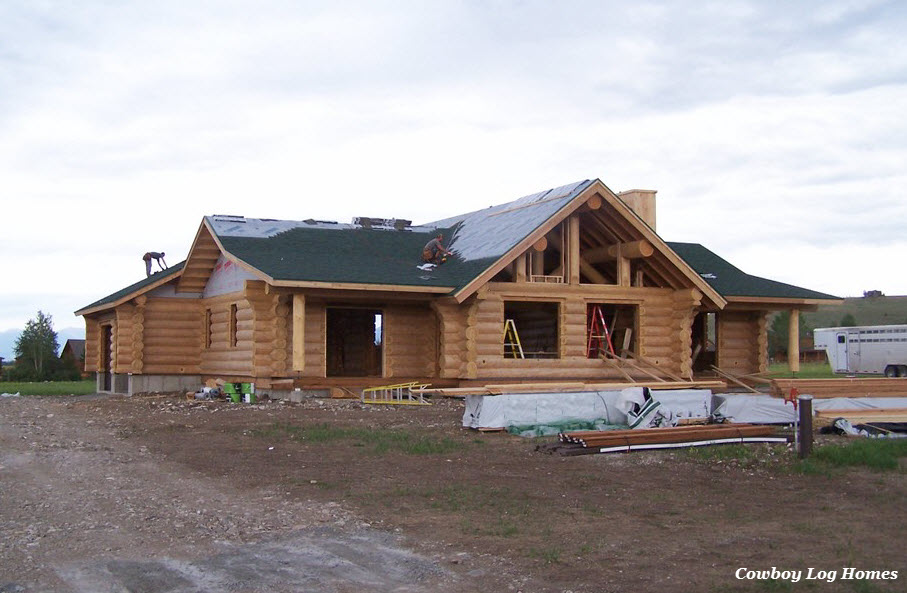
Moving to the front right corner of this custom log home we see the shingles from the chimney to the peak are just being completed.

Now looking straight ahead at the front view of the cabin we see the front left trapezoid window area has been framed in. A few shingles are still being completed on the top left peak.
Continuing on to the west side of the handcrafted cabin we see the great room peak is about half covered with shingles. Also the garage is almost completed on this side.
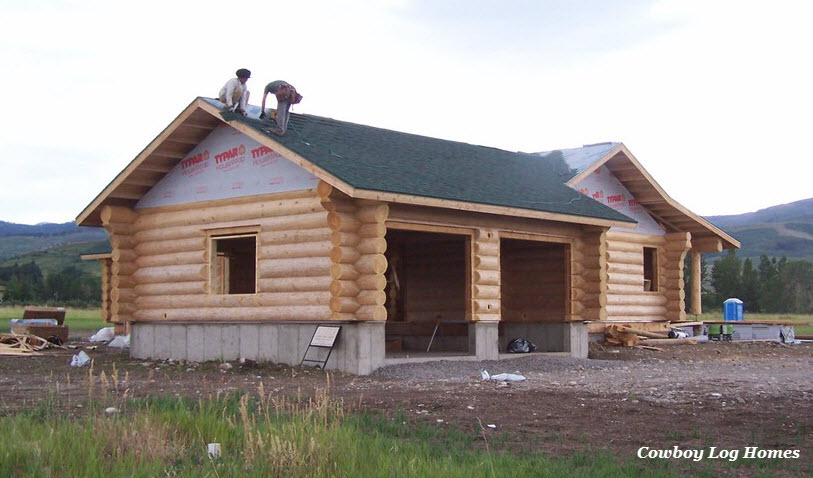
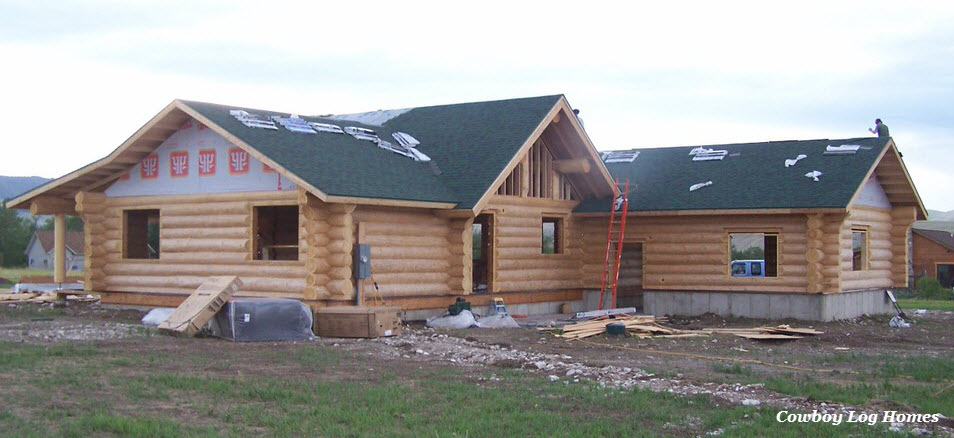
Our last exterior photo shows the far left peak of the attached log garage being completed.
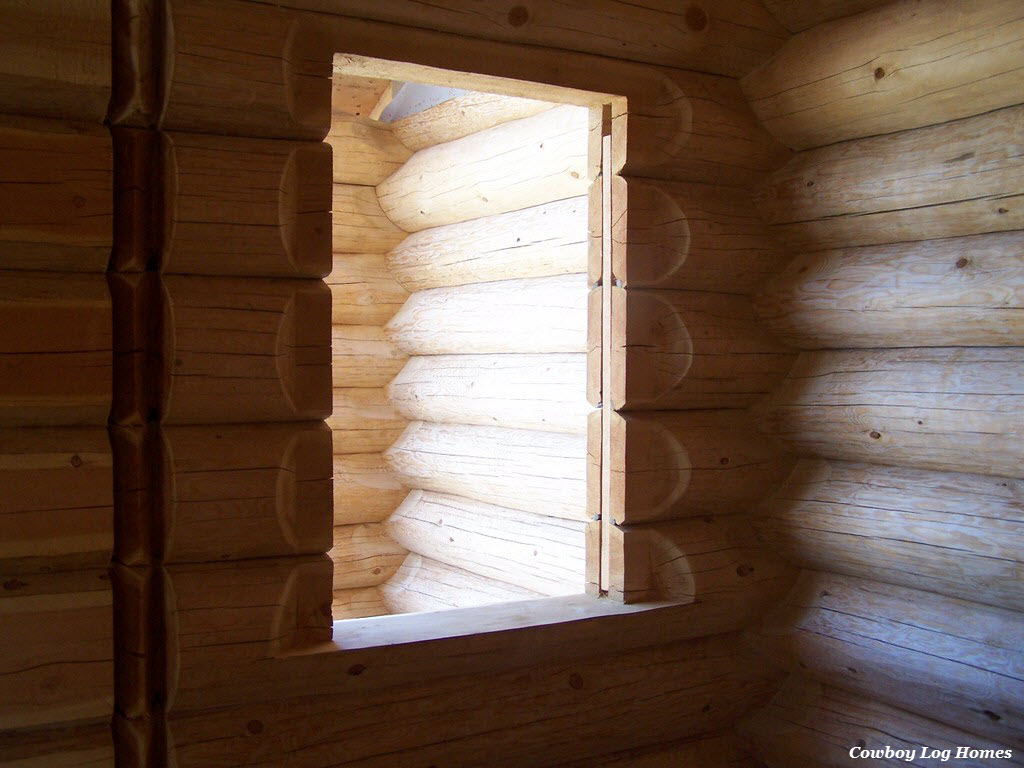
Now moving inside let’s take a good look at the window openings. Below is the window into the master bath. The 2×4 spleen has been cut to fit into the vertical slot on the right side of the window. Notice how the 2×4 stops a few inches short of the top of the vertical keyway slot. This is very important because the last few inches allow for the logs to settle.
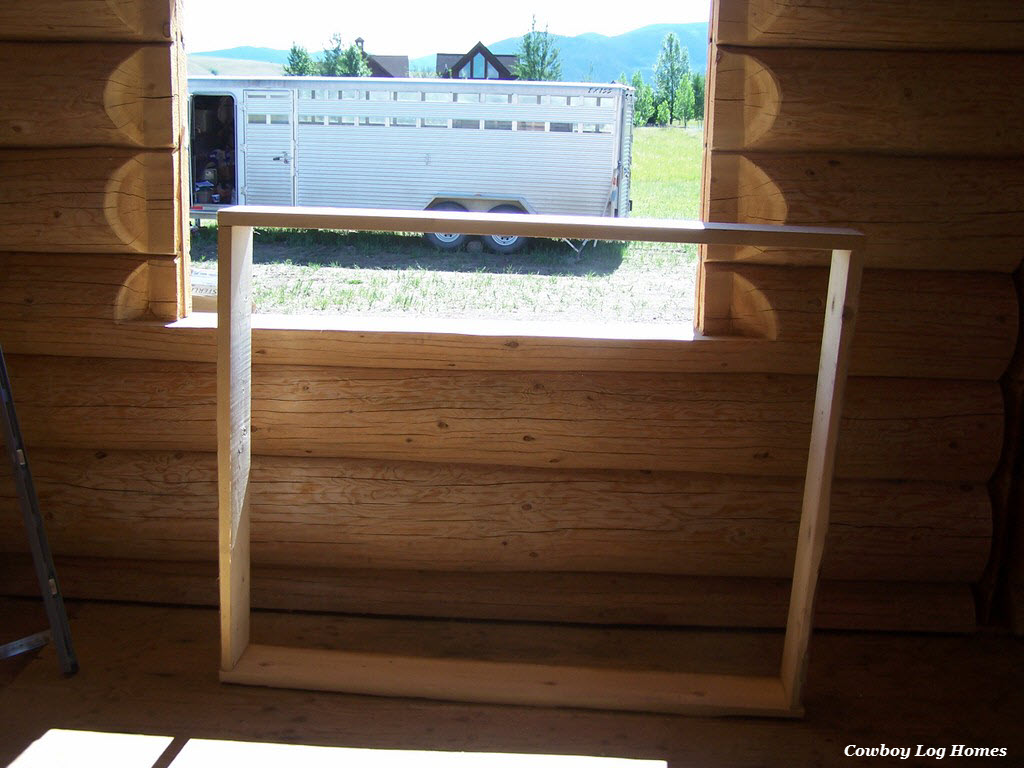
Our next photo shows the rectangular window buck. It is first built and then slid into the window opening.
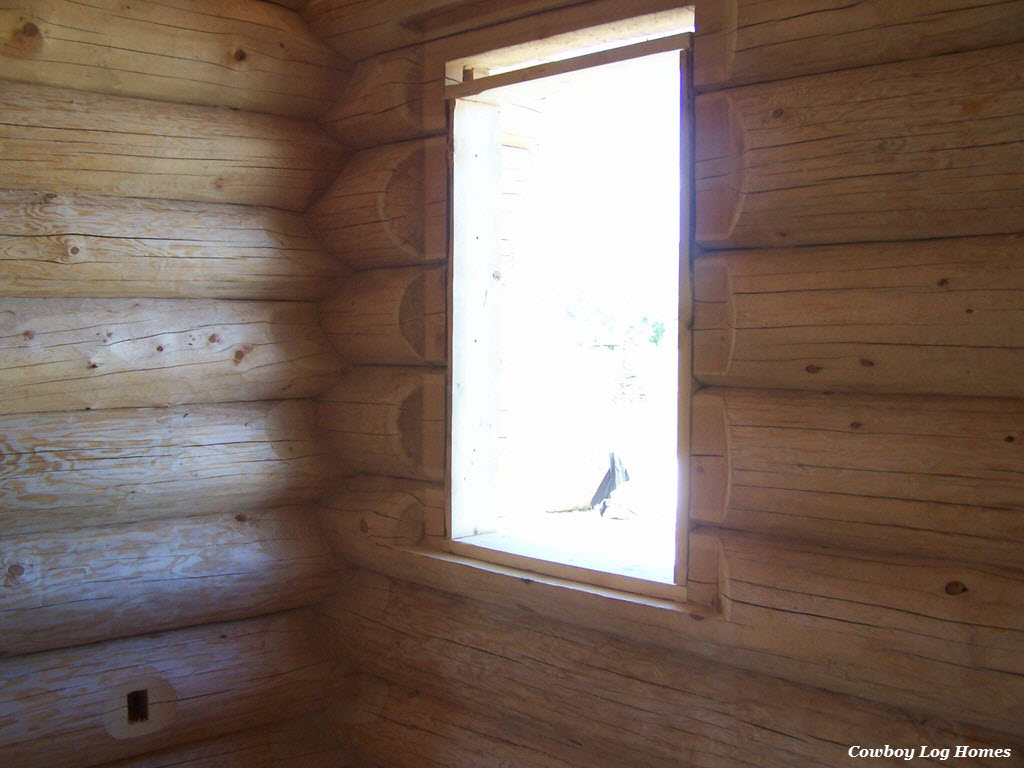
Next we see the window buck installed in the window opening. Notice the top of the rectangular window buck does not go to the top of the window opening. This is the shrinkage channel. The window buck is screwed to the 2×4 window spleen that we saw installed in the vertical keyway slot two photos previous. The shrinkage area above the window allows the logs room for any shrinkage and compression. The window is fastened to the window buck so there is a ‘floating effect’ allowing the logs to adjust to their new surrounding while holding the window rigid. If a window was attached directly to the logs then any movement of the logs would damage or break the window. This is referred to as binding. But with this method there is a transition between the natural logs and the fixed window which removes any possibility of damage to the window.
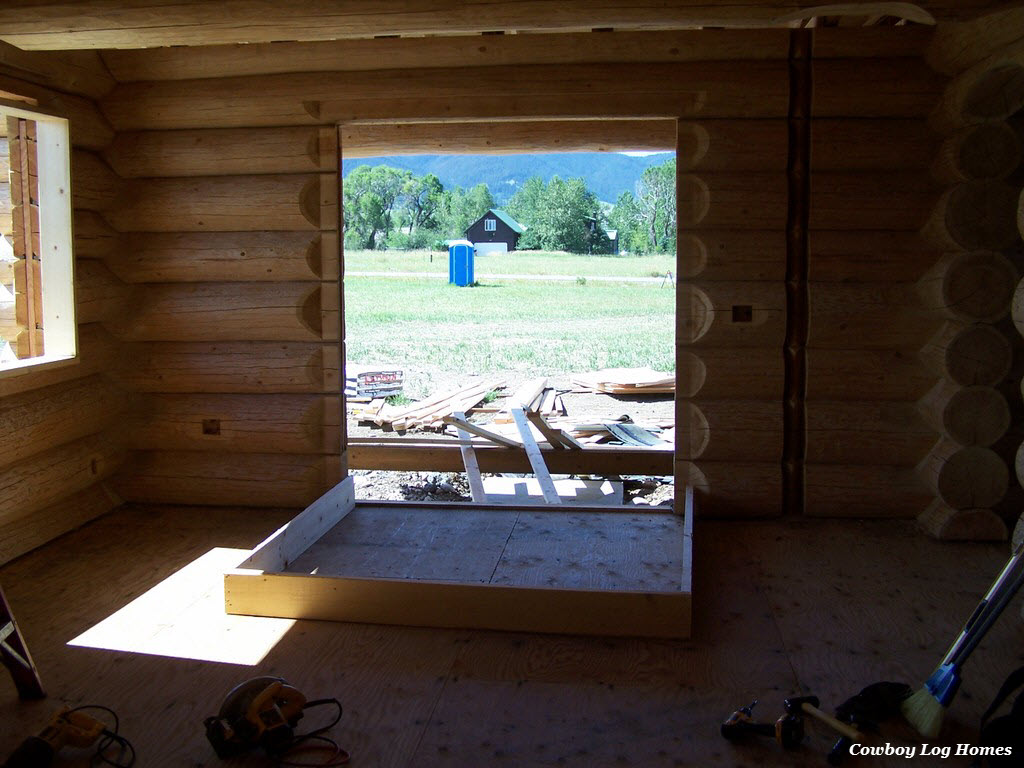
Our last photo of the day shows a larger opening. This is for the 6 foot wide sliding glass door leading out of bedroom #2. Here we see the door jamb assembled and ready for installation. It too will have a shrinkage channel installed above the door opening. This channel will be wider than over the windows. The windows only have a few rows of logs above them while the door extends from the floor to the 8th row of logs, so there is more area for shrinkage. Also visible in this photo is the outlet box holes on the left hand side of the door and the light switch hole on the right side of the door. These were predrilled in the log yard making installation easier on site. The window buck on the left hand window opening has not be fully slid into position when this photo was taken. And the edge of an interior log archway is also visible on the far right hand side of the photo.
Handcrafted log homes have many unique features. When exploring log homes there is a wide variety of pricing but only though a quality log shell is it possible for the log home to assemble as quickly and accurately as this project has progressed. Yes, this is only the 8th day of construction on the job site from when the logs arrive. It is amazing how quickly a FULLY PRUCUT log home shell transitions from being on the trucks to being stacked, roofing in place, and now preparing for the windows. Tomorrow the windows will be installed.